Installing and Configuring Nuxeo Drive
To open assets directly from Nuxeo or to synchronize them with files on your computer, you will need to install Nuxeo Drive.
Step 1: Download Nuxeo Drive
-
On the left-side menu in Nuxeo, click the User Settings (
 ) icon.
 -
Click Nuxeo Drive.
-
Click the appropriate platform: Windows or OSX (Mac).

After clicking, the installation file is downloaded to your hard drive.
Step 2: Install Nuxeo Drive
Click your operating system below and follow the installation instructions.
-
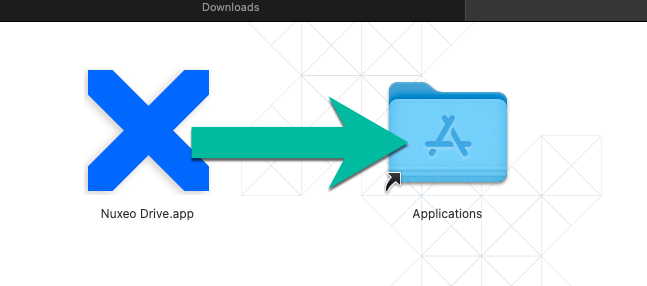
Open the nuxeo-drive.dmg file.
-
Click and drag the Nuxeo Drive icon to the Downloads folder.
-
In Finder, double-click Applications > Nuxeo Drive.
-
Click Open when asked if you want to open the application.
-
On the Share debug info screen, select whether you want to share information with Nuxeo, and then click Apply.
-
In the macOS task bar in the upper right side of the screen, click the Nuxeo Drive icon, and then click Open Settings.
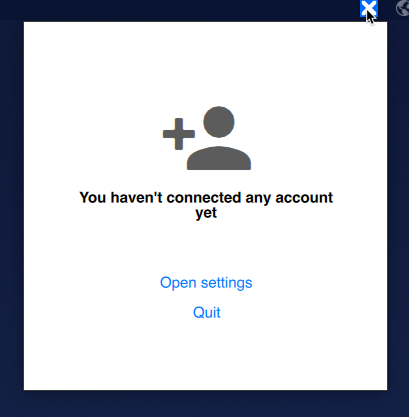
The Nuxeo Drive application will open on your desktop.
-
Open the nuxeo-drive.exe file.
-
On the Select Setup Language screen, select your language, and then click OK.
-
On the License Agreement screen, click the I accept the agreement radio button, and click Next.
-
On the Select Additional Tasks screen, decide whether to create a desktop shortcut, and click Next.
-
On the Ready to Install screen, click Install.
-
When it is finished installing, click Finish.
-
On the Share debug info with developers pop-up window, select the bug reports to share, and click Apply.
-
The Nuxeo Drive application will open on your desktop.
 What if I don't see the Nuxeo Drive application?
If the Nuxeo Drive application didn't open by default, you can open it from the Windows System Tray. Open the System Tray, then right-click the Nuxeo Drive (
 ) icon, and select Settings.
Step 3: Configure Nuxeo Drive
-
On the Nuxeo Drive application, click the Accounts tab, and then click Add account.
-
Do the following in the Add account window:
-
Copy and paste the following into the URL field:
https://psdassets.churchofjesuschrist.org/nuxeo. -
In the Local sync folder location field, click the folder icon (
 ), and then select where you want the Nuxeo Drive folder to reside on your computer.
 -
Make sure the Use legacy authentication box is clicked.

-
Click Connect.
-
-
On the Authentication successful message and Open Nuxeo Drive? pop-up window, click Open Nuxeo Drive.

-
On the Advanced tab, make sure the first four items are enabled.
-
On the Accounts tab, make sure the Web UI is selected (not JSF UI).
-
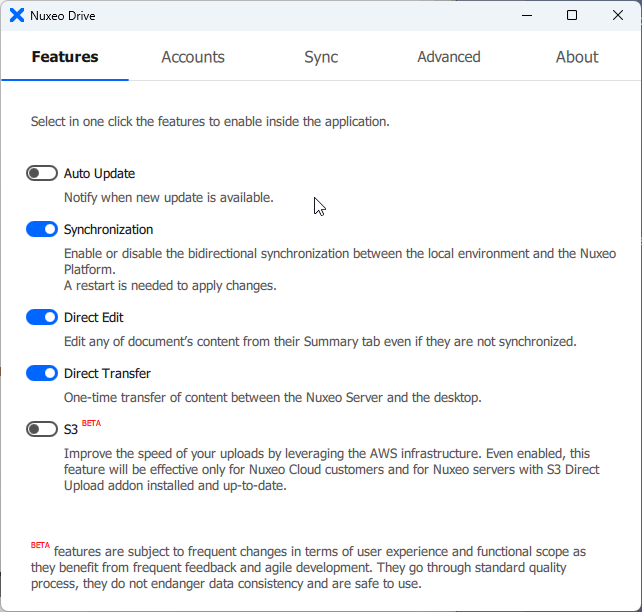
On the Features tab, enable Synchronization if it isn't already enabled. After enabling synchronization, you'll need to restart Nuxeo Drive. After restarting, proceed to the next step.
-
In order to content to sync to your local drive, you'll need to select to sync from the Web UI.
-
Sign in to Nuxeo by going to psdassets.churchofjesuschrist.org.
-
In the left-side menu, click Browse (
 ).
). -
Navigate to the folder you want to sync, and then click the Sync icon (
 ).
).
Note: If you select a project bundle folder, any asset sub-folders will be included.
The content that you selected in the Web UI will now by synced to your Nuxeo Drive folder on your computer.
-


Did you know?
You can also see the folders you have synchronized in your User Profile.
- On the left-side menu in Nuxeo, click the User Settings () icon.
- Click Nuxeo Drive.
- Under “Synchronization Roots,” the folders you have synchronized will be listed. You can click the “X” on the right to unsynchronize a folder.
