Importing Assets
Use this process to import one or more assets at once. You can add some metadata that applies to all, and then finish adding metadata to each file later. Note: If files are larger than 20 GB, use bulk import (see "Bulk Importing Assets").
When you import assets (video, audio, images, documents), the title is required. The system automatically inserts the file name as the title until a title is supplied. Name asset files using the Asset Naming Standards and Media Server File Name Standards. File names should be 128 characters or less.
- Browse to the appropriate team folder where you want to add assets. Note: It must be a project bundle or asset folder (not a team folder).
- Do one of the following:
- Drag and drop the assets in the folder view area. The import window will appear.
- Click the Add Content (
 ) icon or press “c” (for Create) on the keyboard. At the top, select the Import tab. Drag and drop one or more files or click to select files to import.
 - To add metadata, select Add Properties. Otherwise, click Create.
- Select the asset type (asset). The window will display the metadata fields.
- Scroll down to enter the metadata you want to add. Click Edit Next to enter metadata for the next asset, or to apply the metadata to all the assets, click Apply to All. Note: For help with metadata fields, see "Metadata"
- Click Create. The assets will appear in the team folder. To edit metadata for multiple files, see "Editing Metadata for Several Assets at Once"
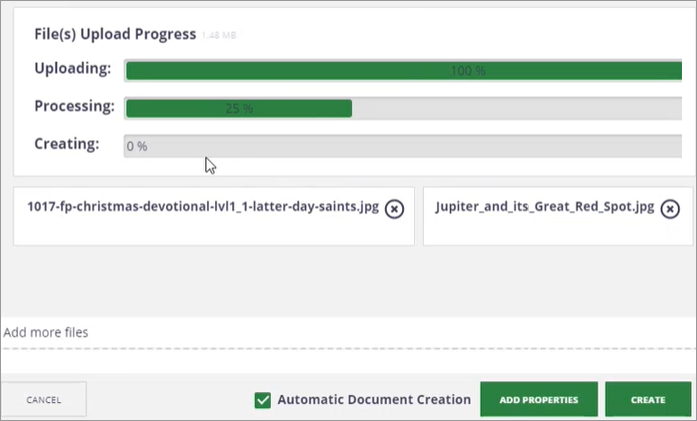
Three progress bars will indicate the import progress (Uploading, Processing, Creating). The window will display the location where the file(s) will be imported.
Note: You can check the Automatic Document Creation box to automatically create the Nuxeo asset document file. However, by unchecking this option, you can continue to drag more files in and then click Create.